Christmas got in the way of stamping
 Christmas and being sick got in the way of stamping! Sorry I have been so busy! today I finally get a chance to relax and enjoy the family. the computer bug has not just hit me my two sons are also on their laptops! What a site to see we are all geeks in our family!
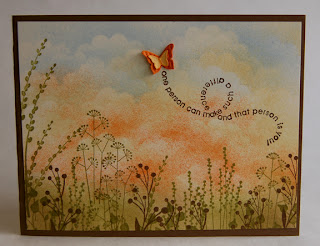
Today's page may be familiar to you as I have created a card similar to this but I thought it would make a great scrap booking page as well. It was the workshop page for this month's stampten.
Supplies
Stamps-Wanted, Stem Silhouettes, Art of Life, Sanded
Ink - Chocolate chip, Marigold morning, Groovy Guava, Pumpkin Pie, Cranberry Crisp
Paper - Chocolate chip, River rock
Accessories- Twine, Chocolate chip satin ribbon, Brayer 1 3/8" circle punch, Post - it - note.
Page - Using a 12 X 12 piece of chocolate chip card stock and stamp with sanded background stamp and chocolate chip ink. When using a background stamp with this size page. You will need to re-ink and stamp again several times, this is why I like this background set it is easy to integrate it with already stamped areas. Taking full sheet of river rock for image area and cut another section 2 1/2 X 11 sheet of river rock for journaling area. One of the things I love about the 12 X 12 sheet of papers is that the 11X 8 1/2 size fits great horizontally without any cutting and you have an instant 1/2 " border. Start Working on the large piece of River rock by masking moon area with post-it-note circle cut from 1 3/8 circle punch. Adhere mask towards the top and begin brayering in layers with the following colors going from lightest to darkest.
Marigold Morning
Groovy Guava
Pumpkin Pie
Cranberry Crisp
When brayering remember to slowly cover less and less areas to create modulation of sky. Sponge in Chocolate chip in lower areas for ground cover. Stamp horses in chocolate chip. Stamp several times with out re-inking to create effect of horses in the background. Lastly stamp foliage using stamps from Stem Silhouettes and Art of Life. Assemble Page By taping journaling area to image area and wrap a length of the brown satin ribbon. Next wrap a length of jute in a circle to create lasso. Take another length of jute tie off with lasso and and adhere on top of ribbon.
Thanks for looking have a Merry Christmas, I am so thankful so many of you stop by to look at what I do. Sorry for the long time between postings check back tomorrow I have one of the new stamp sets to show you!Virginia


Comments